Tutorials → How to Build Apps
Add View Components
After you've defined your Data Model, the next step in building a JourneyApps application is to create the layout of your various views (screens), and then finally to add logic to them.
Therefore, go to the Views tab of your Snag List app. You'll see that you once again start out with simply the Main View.
Let's recap the requirements for our Snag List app:
App Design: Construction Snag List
First and foremost, our app needs to display a list of all the open snag list items, so that the construction contractor or building tenant/owner can quickly see which problems still need to be attended to.
In the Hello World app, you saw how basic components like headings, info, textinputs and buttons work (Tip: A full list of all the view components in JourneyApps is available here).
Add a Heading and Info Text
Let's start by adding a heading and some info text to the Main View of our Snag List app again:
Add a List
Now let's add a list component which will display a list of all our open snags. If you type list (below your heading and info text) and then auto-complete, two options will be shown — list and list (with action). Choose list for now. This will give you a list template like this:
You can now populate the properties in the list as follows:
- bind — if the user selects an item in the list (by tapping on it), this determines in what variable the selected item will be stored (recall that Variables are used to store data locally/temporarily in a view). Let's make it
selected_item. - collection — this is the variable containing the whole list of items that we want to display. Let's make it
open_snags. - label — this is the label that will be shown above the list. Let's make it Open Snags.
- emptyMessage — this is the message that will be shown to the user if the list of items is empty. Let's make it: There are no open snags at the moment.
- type — this determines how the list is displayed. The default is
staticwhich shows all the items underneath each other, whereasdropdownwould show a drop-down list. - required — this relates to input validations, which we'll discuss later in the tutorial (you can ignore it for now).
Your completed list should now look like this:
Add the Variables
We've made reference to variables called selected_item and open_snags, but we haven't defined them yet. Let's do that now.
Underneath "Variables go here" in your view, you can type var to auto-complete your selected_item variable, and give it a type of item. Recall that open_snags is a list of multiple items — therefore it needs to be a special kind of variable — an array. Type array and then auto-complete and fill it in similarly:
![]() Refresh your mobile app — it should now look like the following:
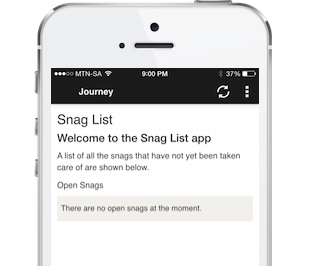
Refresh your mobile app — it should now look like the following:

Of course, there are currently no snags — we'll get to that in the next sections.
This section should give you a taste of how View Components in JourneyApps typically work. We'll cover some of the other components such as menus and GPS capturing later in the tutorial, and you could also check out the full list of view components in the reference documentation for details on how all of JourneyApps' view components work.
