Tutorials → How to Build Apps
Parameters & Arguments
When it comes to the "View Selected Item" view that we're about to create, we clearly have to pass some data to the view when we link to it — namely, the specific snag list item that the user wants to view. In contrast, we didn't have to pass any data to our "Add New Item" view when we linked to it, because it simply creates a new snag list item whenever the user opens it.
For the purpose of passing data to a view, JourneyApps uses standard concepts similar to other programming environments:
- A view specifies its Parameters — the data that it requires you to pass to it. A view can have multiple parameters.
- When you link to a view that expects a parameter, and then pass it a specific object (e.g. a snag list item), that specific object is known as an Argument.
A hypothetical example of this is shown in the diagram below, in the context of some concepts that you are already familiar with, such as Links and Variables:
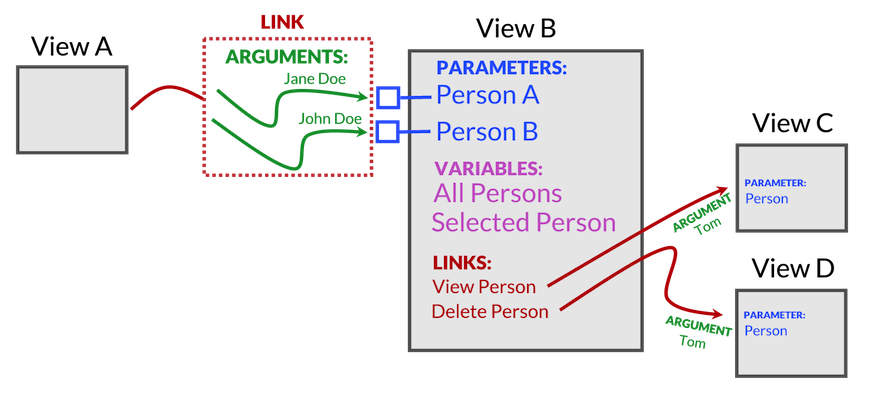
Looking at the diagram:
- View B expects two parameters — both of type person.
- When we link to View B from View A, we pass in two arguments — objects of type person
- There are two outgoing links from View B — to View C and View D respectively.
- View C and View D each expect one parameter.
Accessing Parameters from the View
Inside your View XML and JavaScript, parameters are accessed in exactly the same way as variables. In other words, you can bind input components to them and access them from the JavaScript using the view. notation.
Add a Link with an Argument
Open up the Main View of the Snag List app in the App Editor again. Let's add a "View Selected Item" button alongside our existing "Add New Item" button, and specify that it will use a link called view_item. Remember to set validate="true" to validate that the user has selected an item from the list (as discussed in the previous section).
Now use the link auto-complete template to add the view_item link:
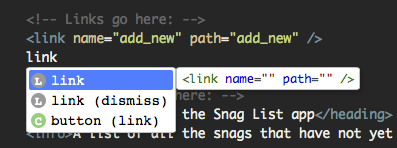
You can make the path of the view the same as the name again:
Now add an <arg /> tag inside of the <link /> as shown below — this will allows us to specify the argument we want to pass to the view_item view. Recall that our <list> specifies bind="selected_item" — therefore, it stores the selected item in the selected_item variable. Therefore, specify selected_item as the argument to the link:
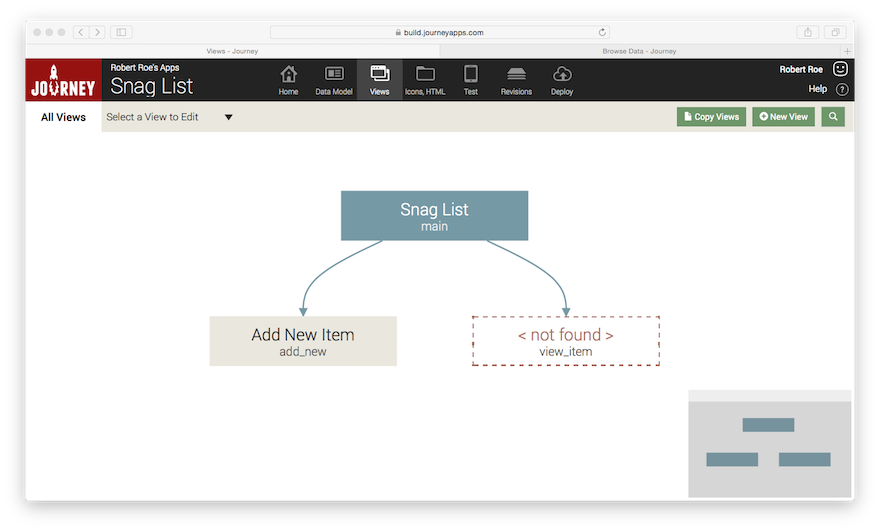
Click on the All Views link at the top left of the screen, or on the Views tab in the App Editor's top menu again. Your view flow should now look like this:
Create the View and Specify Parameter
Now create the view_item view:
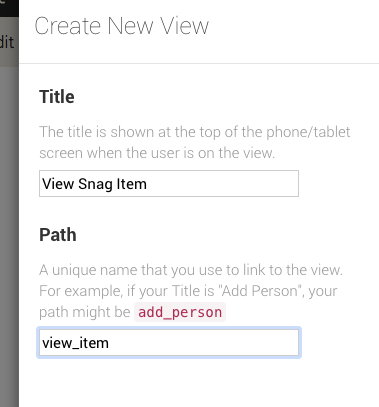
This view needs to accept an item parameter. Under the "Parameters go here" section of the View XML, type param and auto-complete. Then fill in a name for the parameter and specify the type as item as seen below:
Add Some Components
Now let's add some components to display the details of our snag item. A new component that we're using here is table (which allows displaying a 2-column table).
Note thatitem.comments is wrapped in curly braces. Remember Display Format from the "The Data Model" section of the tutorial? Displaying the value of a variable or parameter within text uses the same syntax in JourneyApps.
In fact, almost anywhere where you are typing text in your View XML that will be displayed to the user, you can include the value of a variable using this syntax. For example, we could remove the table component and simply make our heading display the snag list item comments as follows:
Test on Mobile Device
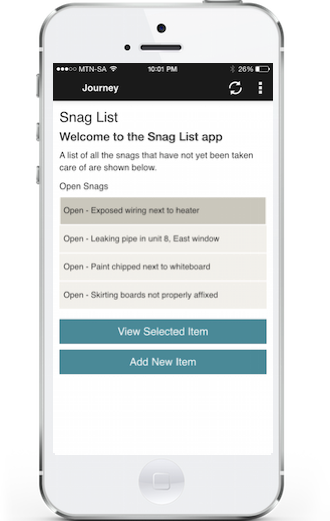
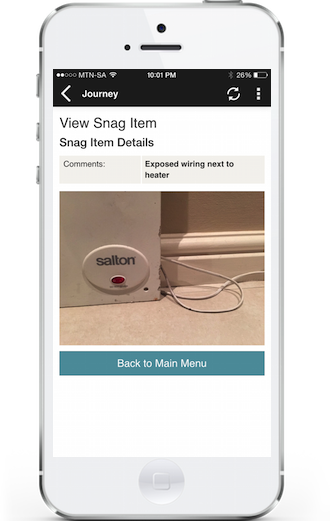
![]() Refresh your mobile app and you should now be able to select and view an item (in the 2nd screenshots below, you can see what the table component looks like).
Refresh your mobile app and you should now be able to select and view an item (in the 2nd screenshots below, you can see what the table component looks like).