Tutorials → How to Build Apps
Snag List App: Next Steps
Let's look at further requirements for our Snag List app:
App Design: Construction Snag List
When more and more snags are captured in the snag list app, it will become problematic to browse all the snags in a single list. We want to allow users to organize snags into categories, and then to browse the lists of snags by category.
Relationships
Therefore, we want to make it possible for categories to be created in our database, and then each snag list item must be assigned to a particular category. In order to implement this functionality, we'll make use of Relationships in our Data Model.
Relationships allow us to define how our different object types relate to each other. If we create a new Category object type, we'll say that each category has many snag list items that belong to that category. This is called a one-to-many relationship.
Add a New Object Type
First of all, let's add the Category object type to our Data Model XML. It only needs one attribute: the category name.
Add a New Relationship
Next, we'll create the one-to-many relationship between the two object types. This is done by adding a belongs_to tag to the Item object type, and a has_many to the Category object type as shown below. Note that the name="" property on the has_many allows you to specify a name for the whole collection of items that belong to a category. Using the pluralized form of the object type (in this case, "items") is a good convention to use for the collection name.
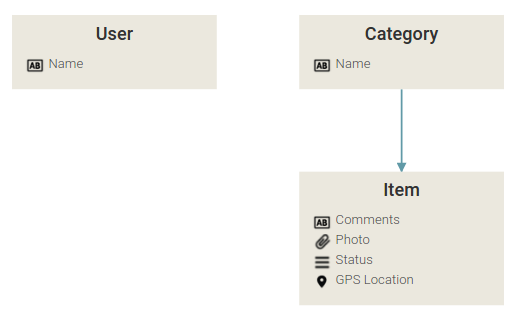
See the Relationship Visually
If you click on the Visualize tab of the Data Model, your Data Model graph should now look like this, indicating that each category has many items that belong to it:
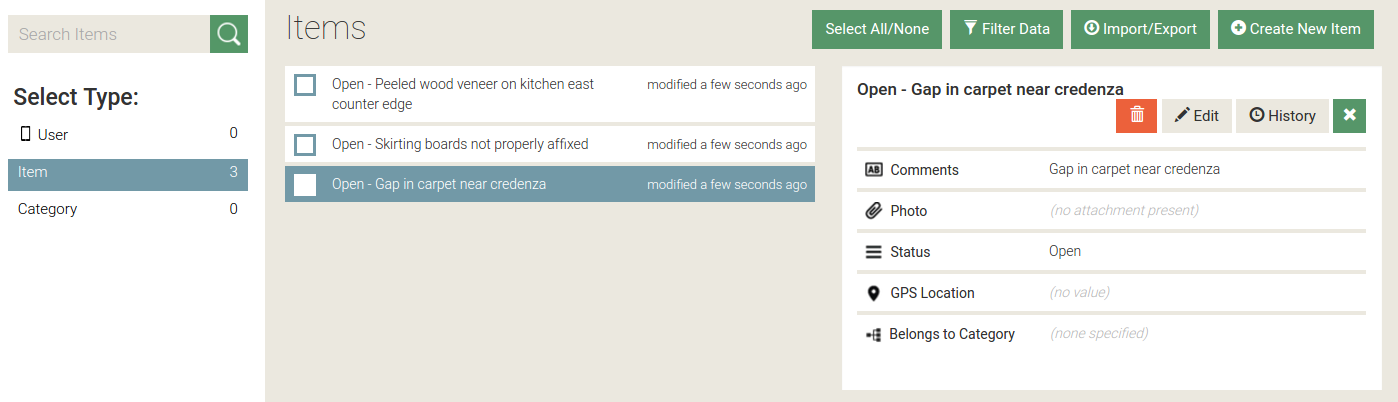
See Changes in App Backend Data Browser
If you go to the Deploy tab again and then to Browse Data for the "Testing" environment, you'll notice that there is a new Category object type shown on the left, and that clicking on an Item shows a Belongs to Category field at the bottom:
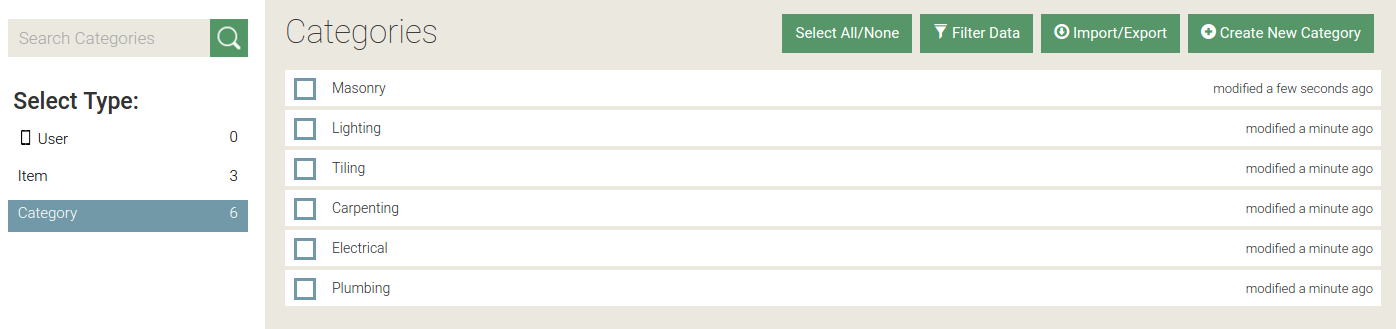
Click on the Category tab on the left. Let's create a couple of categories:
Set Category on "Add New Item" Screen
Now let's add the category selection to the Add New Item view. Under the "Variables go here" section of the View XML, add an array in which we'll store the full list of categories:
Then change the init() function to populate the categories using a Query:
Finally, add a list View Component allowing the user to select the category. Note that:
- We specify
type="dropdown"to create a drop-down list - We specify
collection="all_categories"so that the list will show all the categories that we've pulled using our Query. - We specify
bind="item.category"so that the category that the user selects will be stored in the category relationship on our item variable.
Test on Mobile Device
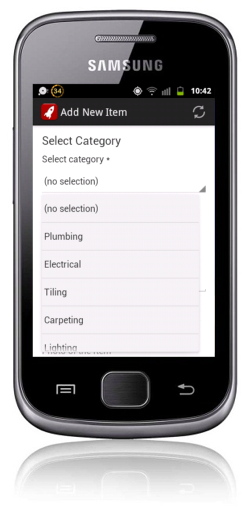
![]() Refresh the app on your mobile device. At "Add New Item", you should now see a drop-down list to select a category:
Refresh the app on your mobile device. At "Add New Item", you should now see a drop-down list to select a category:
View Relationship on App Backend Data Browser
After you've added a new item, if you open up the Data Browser for the "Testing" environment again, you'll see "Belongs to Category" for the item shows the category that you've selected:
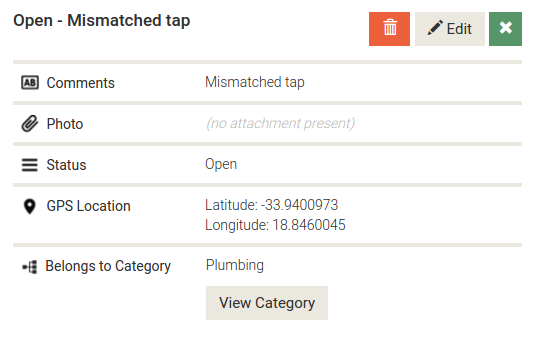
Display Category at "View Snag Item"
If we want to show the category on the View Snag Item view, we could adjust our table component there as follows:
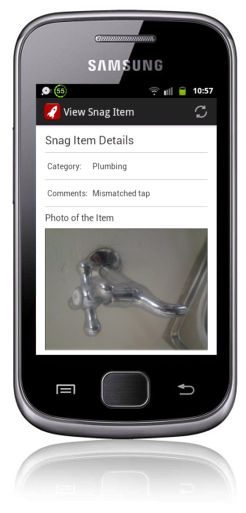
![]() Refresh the app on your mobile device and you should see:
Refresh the app on your mobile device and you should see:
Enable Filtering by Category
Lastly, we want the user to be able to browse snags by category.
Add a Menu Button
Let's start by modifying the menu on our Main View to include a "Browse by Category" option:
Add a Link
Under "Links go here", add a browse_by_category link:
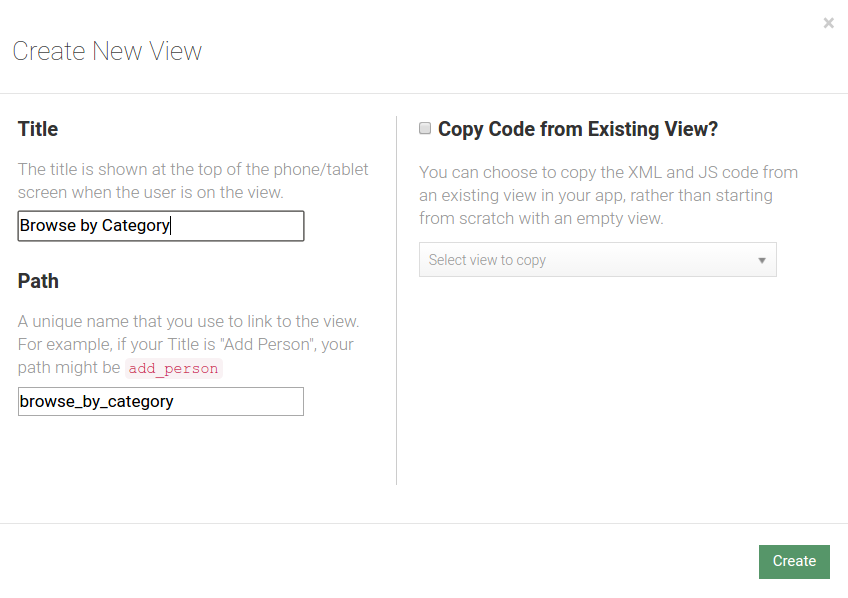
Add the "Browse by Category" View
Now create the "Browse by Category" view:
Add View Variable, Link and Components
Our new view will simply display a "clickable" list of categories. The View XML:
Add JavaScript Logic
On the JavaScript side, we initialize the all_categories array and create the function we specified for the clickable list, which simply follows the link:
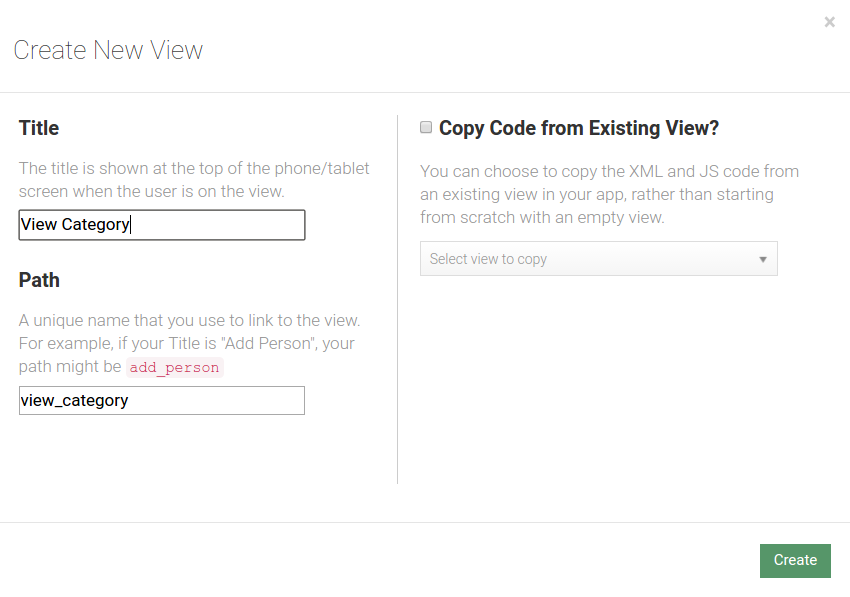
Add the "View Category" View
Now create the view_category view that we linked to:
The View XML
In our View Category view, we specify that it receives a category as a parameter, create an array to store all the items in the given category, and create a clickable list to allow an item to be viewed:
The JavaScript Logic
On the JavaScript side, firstly, in the init() function, we store all the items that belong to the category variable in the items_in_category array. Because we specified name="items" on the has_many relationship definition in our Data Model earlier in this section of the tutorial, we are able to access all these items using category.items as a result. We also add the function required by our clickable list:
Test on Mobile Device
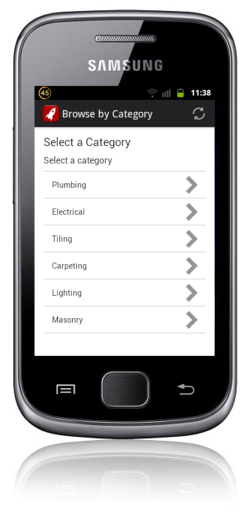
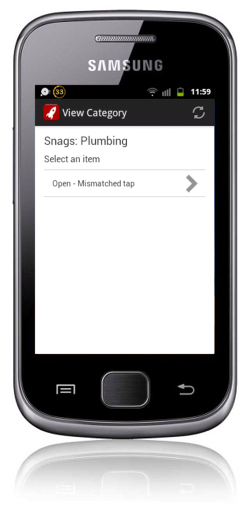
![]() Refresh the app on your mobile device and test the "Browse by Category" feature:
Refresh the app on your mobile device and test the "Browse by Category" feature:
Fix the "Back to Main Menu" Button
If you've viewed a snag item from the "View Category" screen, you may notice that the "Back to Main Menu" doesn't actually return you to the Main View anymore, but simply to the previous screen. This is because that button simply called dismiss() which returns the user to the previous view. To fix this, in our View Snag Item view, we can change the "Back to Main Menu" button to use a Dismiss Link. First, create a new Dismiss Link:
And then modify the button:
If you click on All Views at the top left of the screen, or on the Views tab in the App Editor's top menu again, you should see that your view flow now looks like the below. Another Dismiss Links is now indicated with a grey line back to the Main View:
