Tutorials → How to Build Apps
To complete our "Add New Item" screen, we want to add a button that saves the item and takes the user back to the Main View.
Before we do that, a word about the View Stack in JourneyApps:
The View Stack
Imagine that each view on the mobile device is a sheet of paper. For each view that the user opens (by following a Link), a sheet is added on top of the others. Together the sheets are known as the View Stack. Only the top sheet of the stack is ever displayed to the user. Whenever the user goes back, it would be as if the top sheet is removed and the user sees the next sheet that was underneath it.

For instance, if the user has the Main View open and then goes to the Add New Item view in our Snag List app, there will be two views on the stack: the Main View at the bottom and Add New Item on top of it.
Dismissing & The Back Button
When a user goes back to a previous screen in the View Stack, this is referred to as Dismissing the current view. A user can press the back button (built-in on Android devices, or in the title bar on iOS devices and Chrome) to go back to the previous view in the stack.
We'll now make use of this concept in the "Add New Item" view of our Snag List app — when the user presses a button to save the new item, we need to go back to the Main View.
Finish Up "Add New Item"
There's a built-in dismiss() JavaScript function in JourneyApps that takes the user back to the previous view. Let's add a button to our "Add New Item" screen that uses this function — choose the button - js auto-complete template in the View XML:
Test on Mobile Device
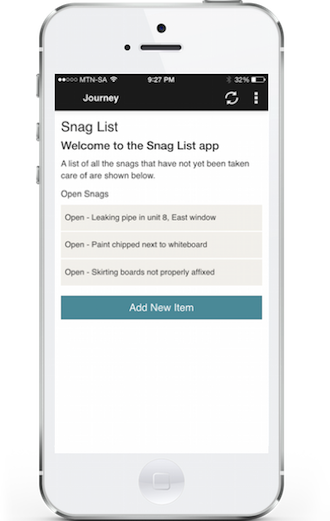
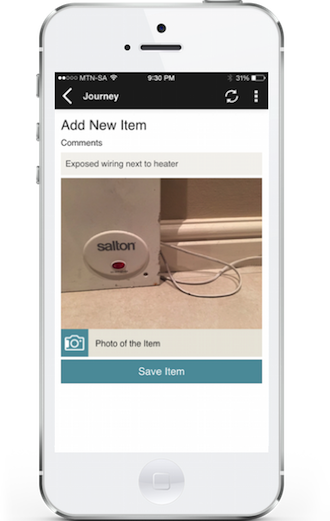
![]() Refresh your app on the mobile device. You should see your "Add New Item" button that's been added to the Main View. Clicking on it shows the "Add New Item" screen where you can capture a new snag item:
Refresh your app on the mobile device. You should see your "Add New Item" button that's been added to the Main View. Clicking on it shows the "Add New Item" screen where you can capture a new snag item:
![]()
Once you've saved the item, you're taken back to the Main View where your new item now appears in the list:

Auto-Saving of Data
You'll notice that you simply had to call the dismiss() function to return the user to the main screen, and the new snag was automatically saved. This brings us to an important point: Any objects stored in your view variables in JourneyApps are automatically saved when you proceed to a next view or dismiss to go back to a previous view.
The only case where data is not automatically saved is if the user presses the "back" button, since we assume this means they want to cancel what they were doing and discard their data.
View the Data in the Cloud
If you go to the Deploy tab again and then to Browse Data for the "Testing" environment (like in the Queries and Data Sync section of the tutorial), and then view your Items, you'll see that your newly added item was synchronized from the mobile device to the cloud, and it happened automatically in the background:
