Tutorials → How to Build Apps
Queries
In the previous example, we created open_snags as the array variable which will contain all of our open snags. In order to populate that variable with data, we need to use a Query, which pulls data from the datastore in the JourneyApps mobile app. Queries are defined on the JavaScript side of the relevant view. Before we define our query, a word about the init() function in JavaScript:
The init() Function
You'll notice that every View in JourneyApps has a an init() function in its JavaScript. This function is automatically called every time that the user opens the particular view, and therefore its purpose is to allow you to initialize any data that you might require in the view. For example, setting default values for new objects that are created, or performing Queries are typical things that you might do in the init() function.
A Simple Query
In the Main View of your Snag List app, you can create a query that pulls all snag list items and stores them in open_snags as follows:
- Recall that you can access your variables in the JavaScript using the
view.prefix. DB.itemis automatically made available because we've defined theitemObject Type in our Data Model.
Filtering
The query we've now added will show all snag list items in our <list> — however, we only want to show snags that have "Open" as their status (as defined in our Data Model).
This can be done by filtering the query. To retrieve only the "Open" snags, change your code to the following:
The first argument of the where() function is a string specifying the condition of how we want to match objects, and the arguments thereafter are the values that we are actually matching against.
Use Numeric Indexes for Enums
When filtering on an attribute that is an enum, we use the index of the enum option we're interested in, which starts counting at zero. Our Data Model had "Open" and "Closed" as the enum options for the "Status" attribute of our snag list items, therefore 0 is the index for "Open". Therefore, the above Query will filter snag items to those that are "Open".
You can learn more about filtering in detail in the reference documentation available here.
Global Automatic Data Sync
Recall from the Global Automatic Data Sync section of the JourneyApps: The Big Picture tutorial that mobile devices running your app automatically synchronize data from the cloud datastore to their local storage memory for offline access. This offline cached data is what is queried when you run a Query.
Let's see that data sync in action. First, go to the Deploy tab of your Snag List app:
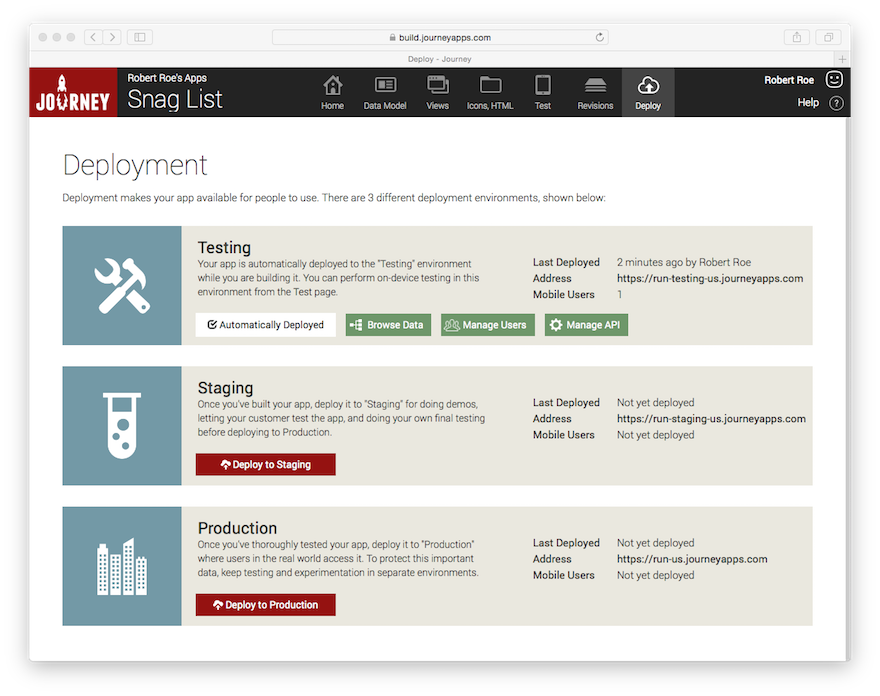
Then click on Browse Data under Testing. This will open a new tab/window. After the redirect, click on Item in the lefthand sidebar and you should see the following:
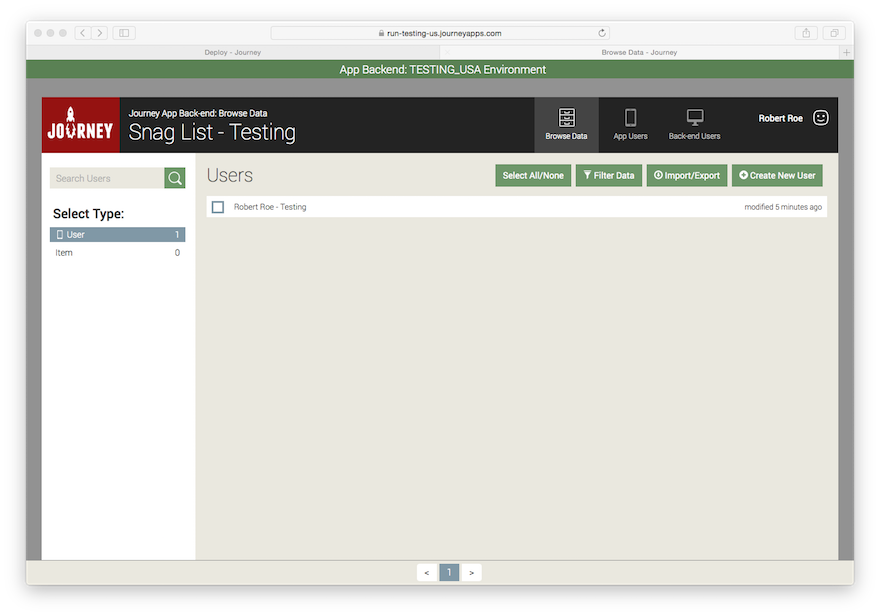
The "Testing" App Backend is where you manage the data for your "Testing" environment (which is the environment that is used while you're developing apps in the JourneyApps Editor — recall the Components of JourneyApps and Environments and Staged Deployment sections of the JourneyApps: The Big Picture tutorial.)
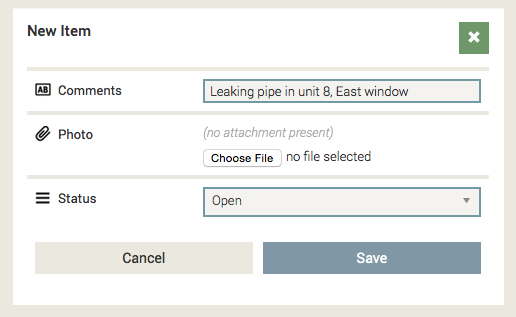
Create Some Data
So if you add some snag list items here, they will be synchronized to your mobile device.
Add a couple of items by hitting Create New Item:
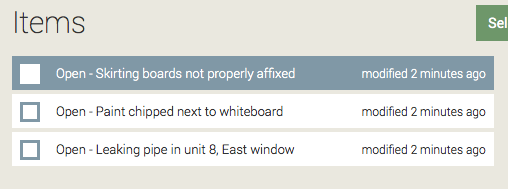
You should now see your items like this:
See Synchronized Data on Device
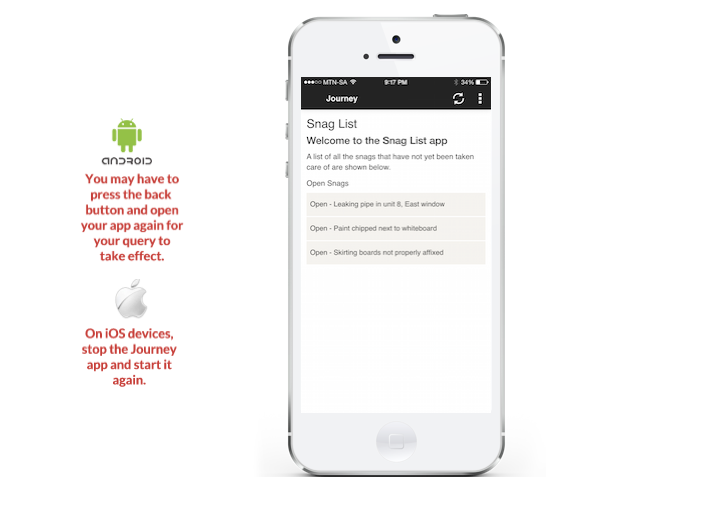
Now ![]() refresh your mobile app. Remember that the
refresh your mobile app. Remember that the init() function containing your query runs when you open a view, so to run the query again, you need to re-open your Main View.
- On Android devices, press the built-on "back" button and open your mobile app again.
- On iOS devices and Chrome, stop your app and start it again.
In summary, you've seen how JourneyApps' built-in automatic data synchronization works, and how you can use a Query to pull data from the local/offline mobile datastore and display it in your Views.
Let's get to work on fleshing out the functionality of our Snag List app in the next sections.