Tutorials → How to Build Apps
"Hello World"
The best place to start when using any new tool is to create a "Hello World" app — the simplest possible app that you can create. Let's do that right now.
Create the Hello World App
Hit the + (New App) button in the App Editor as shown:

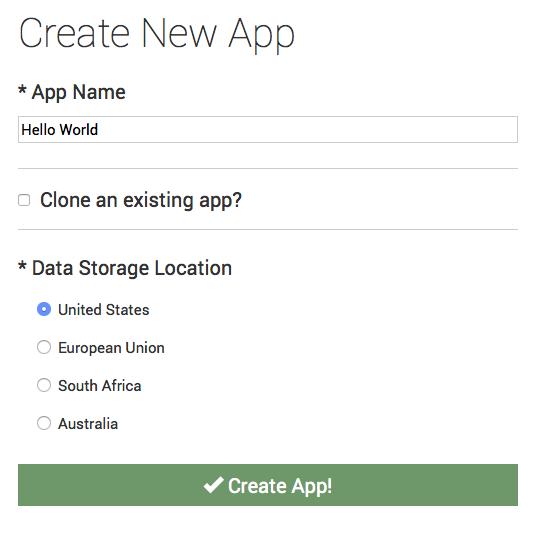
Enter a name for the app and hit Create App:
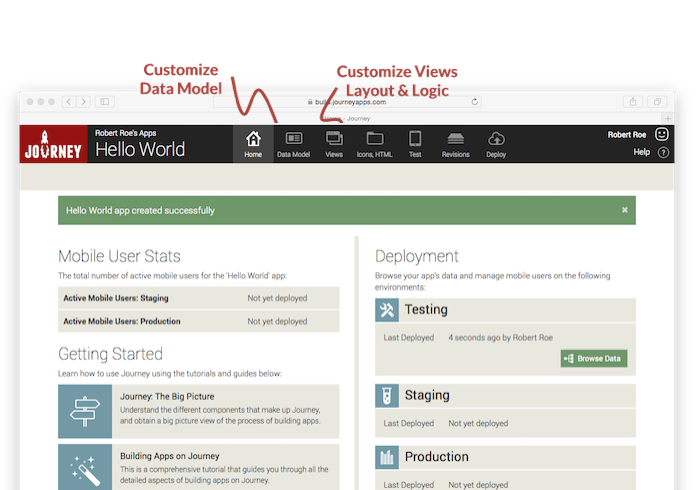
You should now see the following:
![]()
An App Consists of a Data Model and Views
As you've seen in the JourneyApps: The Big Picture tutorial, building an app on JourneyApps involves the customization of two kinds of things:
- Data Model: This describes the data that your app makes use of (in more technical terms: object types with their attributes and relationships)
- Views: This defines the layout and logic for the actual screens in your mobile app.
In your Hello World app, you can see that the Data Model and Views tabs on the menu allow you to customize these things for your app.
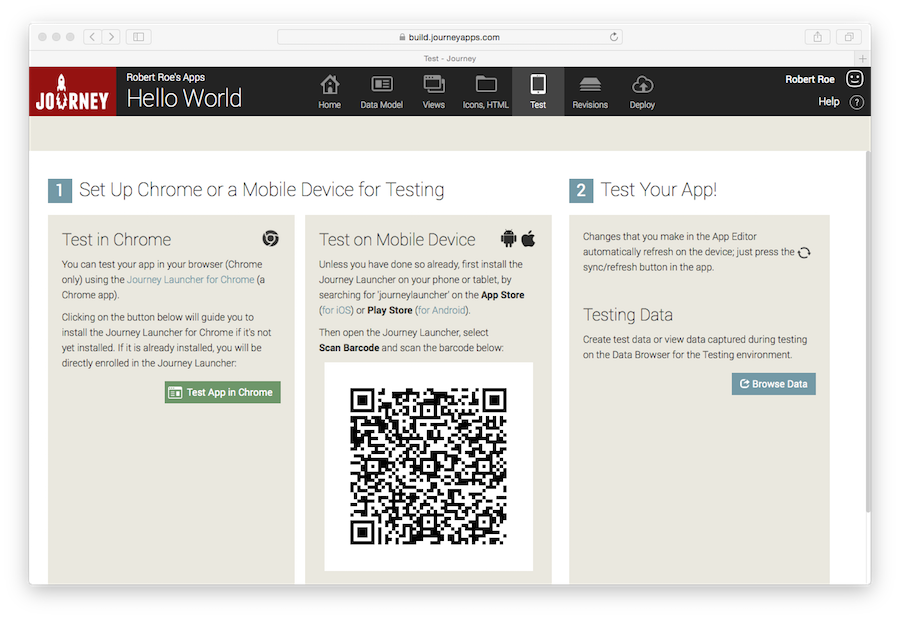
Testing Your App: Link a Mobile Device or Use Chrome
An important concept in JourneyApps is that you should test your app continuously while you are building it. Therefore, immediately go to the Test tab of your Hello World app and follow the instructions to either:
- Install the JourneyApps Container from the Play Store (Android) or App Store (iOS) and link your Hello World app to a mobile device.
- Test the app in your web browser (using the JourneyApps Container from the Chrome Web Store)
The app should now look like the following on your mobile device (the screenshots in this tutorial depict an iOS device, and the app will look very similar if you are using an Android device or Chrome). As you can see, you start with a blank clean slate:
![]()
Main View
Now click on the Views tab for the Hello World app in the App Editor. What you see here is a visualization of the "flow" of your app — in other words, all the screens in your mobile app, and how they tie together. Right now, there is only a single "Hello World" view, with "main" shown underneath it:
![]()
This is referred to as your Main View. Every JourneyApps application that you create starts with a main view, and whenever you open a JourneyApps mobile app on a mobile device, the main view is always the screen that will be shown first (this is the blank screen that you are currently seeing on your mobile device).
Editing a View
You can now click on the Hello World Main View. You should see the following, which allows you to edit:
- The Structure/Layout of the screen — using XML, on the left side.
- The Logic of the screen — using JavaScript, on the right side.
![]()
The visualization of the "flow" of your app seen in the previous picture is automatically generated based on the XML code of all your views. We'll cover this in more detail later in the tutorial.