Tutorials → How to Build Apps
In this section we'll complete our Hello World app.
Adding View Components...
Let's add something to the main view. User interface elements that you add to a screen in your mobile app are referred to as View Components in JourneyApps.
There are a variety of view components available in JourneyApps, which we'll cover in detail at a later stage — let's start with something simple — a heading and info text for the main screen of the Hello World app.
...Using Auto-Complete
The easiest way to edit the XML for your view is to use the auto-complete functionality that comes built-in with JourneyApps. To add a heading, type head under the "Components go here" section and press Ctrl + Space
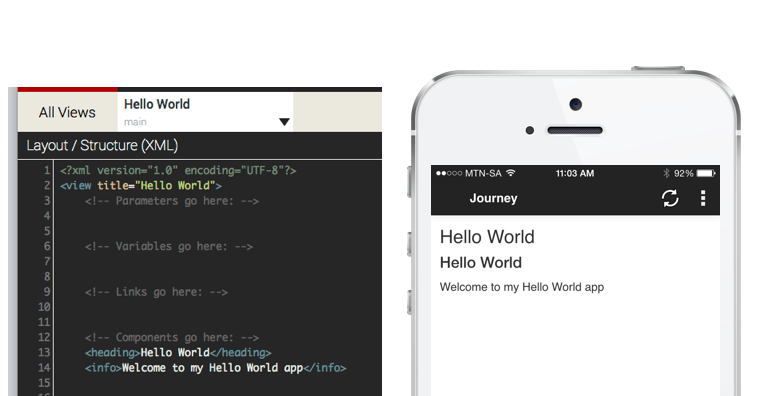
Your View XML should then look like this, with a new heading that's been inserted:
You can then advance your cursor to the next piece of XML code that needs to be filled in by pressing Ctrl + . (that is, Ctrl and the period / full stop key). Pressing Ctrl + . will therefore highlight "A Heading". Now type "Hello World" to replace "A Heading".
Next, insert some info text below your heading. Type info followed by Ctrl + Spaceand then Ctrl + . to move your cursor inside the info tag, then type some text like "Welcome to my Hello World app". Your view should then look like this:
We will explain the purposes of the other sections (Parameters, Variables, Links) later in the tutorial.
Automatic Saving, Deployment & Testing on Mobile Device
Note that whenever you've typed something into the JourneyApps Editor, it will automatically be saved. There is no need to save anything explicitly.
Furthermore, you may have noticed that every time you make a change, the Deploy icon in the menu is spinning:
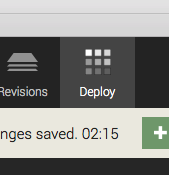
This means that your app is automatically being deployed to the Testing Environment (recall the Environments and Staged Deployment section in the JourneyApps: The Big Picture tutorial)
Your app will try to refresh itself automatically on the mobile device so that you can see the changes you're making (if it doesn't, press the "refresh" ![]() button at the top right corner).
button at the top right corner).
You should then see that the heading and info text that you added is dynamically interpreted and rendered as user interface components on the mobile device, like below:
Add an Input Component
Now let's make the app a bit more interactive by adding an input component.
App Design: Hello World
We want to complete our Hello World app by making it ask the user to enter their name, and then have a button that will make the app display a greeting when it is pressed.
In a full-blown JourneyApps application, we would use the Data Model as we'll show you later, but for now, to keep things really simple, we'll simply use a local variable to store user input. To add a local variable, type var under the "Variables go here" section in your View XML and hit Ctrl + Space to auto-complete as usual.
We want to ask the user to enter their name, so type something like your_name for the name property, and then string for the type property. string indicates that we'll be storing text in this variable (we'll show you all the different data types later.)
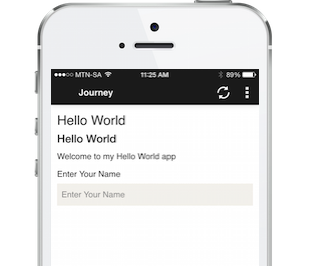
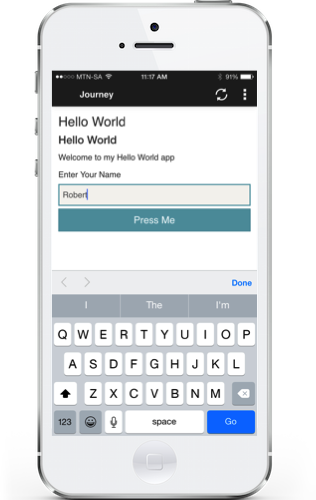
Next, to add a text input, type text under "Components go here" and then auto-complete as usual, which will add a textinput component to your view. Make the label of the textinput something like "Enter Your Name", and the bind property should be your_name — the name you've given your variable. The bind property tells the textinput where it should store the data that the user entered — in this case, we want to store the user input in our your_name variable.
Your mobile app should now look like the following:
Add a Button & Hook It Up With JavaScript
To add the button, type button and then auto-complete as usual. Because there are different kinds of buttons, you will see a list like the following:
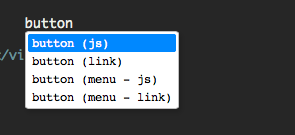
We are interested in button - js for now, so choose that one. It allows us to call a JavaScript function when the user presses the button. Give your button a label and an onpress property as seen below. onpress specifies the name of the JavaScript function that will be called when the user presses the button.
Now we need to create that sayHello JavaScript function that we specified in onpress. On the JavaScript side of the view (on the right-hand side), add the following:
dialog() is a function built-in to JourneyApps that shows a dialog to the user. It takes two arguments — the heading and the content of the dialog. In order to access any variables that have been defined in our View XML from the JavaScript, we need to prepend their names with view. — therefore view.your_name will display what the user entered in the textinput field, since the textinput stores the text entered in the your_name variable.
Now test your app on your device. It should do the following:
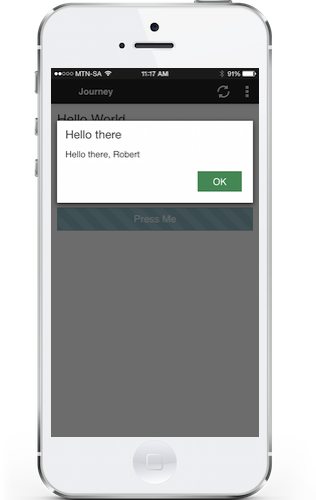
Congratulations, you've completed the Hello World app!